

POST ANCHORING
All posts should be attached to the ground. Below are the most common scenarios.
The anchor kits can be made of stainless steel or standard steel. Standard Steel anchors are painted black while the stainless are left unpainted. We recommend stainless steel anchors and bolts only for moist areas, waterfront, or areas where groundwater is nearby. For most applications, standard steel will last decades. Our anchor kits, whether for concrete or wood decks, come with everything you need to attach your structure securely
OPTION 1: STANDARD ANCHOR KIT
The standard anchors sit on the surface and attach using either 4 expansion anchor bolts (for concrete) or 4 lag bolts (if attaching to a wood deck). The posts sit in the anchor’s saddle and are attached to the anchors with lag bolts provided. A wood trim box is included to hide the hardware from view (see anchor kit installation instructions below).
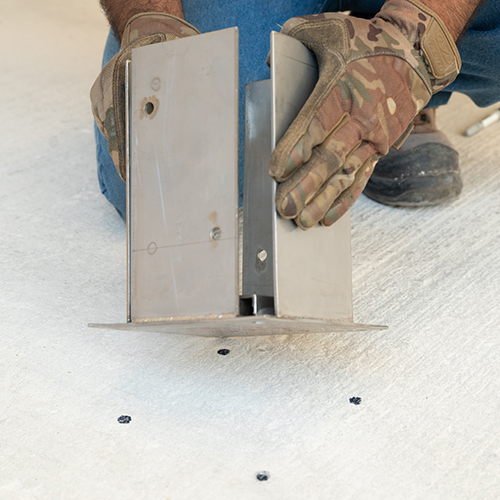
STEP 1: Place the anchor where it will be installed; mark the ground as shown
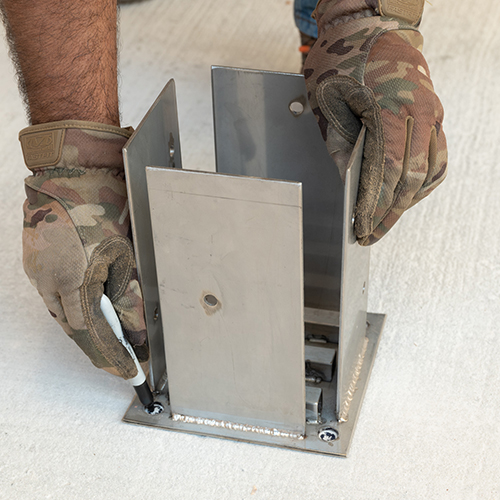
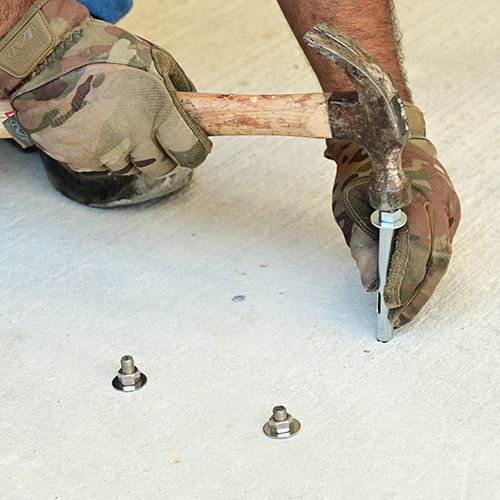
STEP 2: Drill for holes as shown ½” wide hole 4” deep and hit down the anchor bolts (1/2” x 4”) with a hammer. Then take off the nut before you place the metal anchor (note: for wood deck use lag bolts).

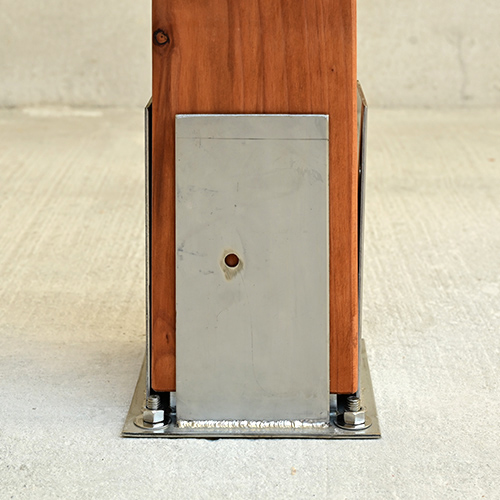
STEP 3: Place and attach the metal anchor to the concrete with an anchor bolt (1/2” x 4”) and place the post.
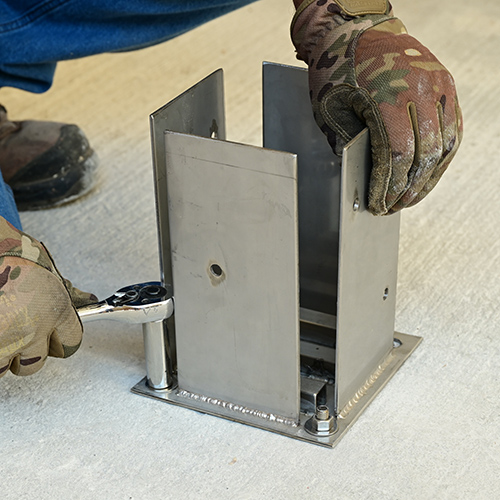
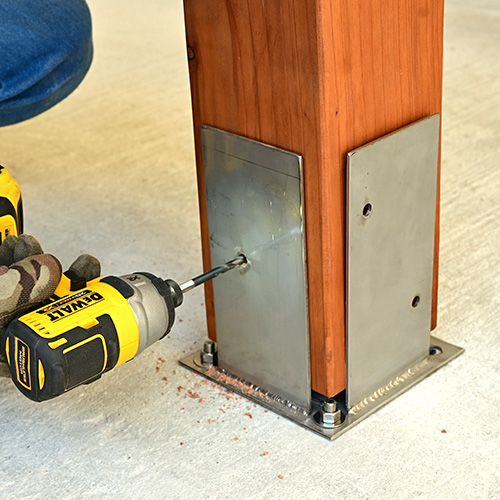
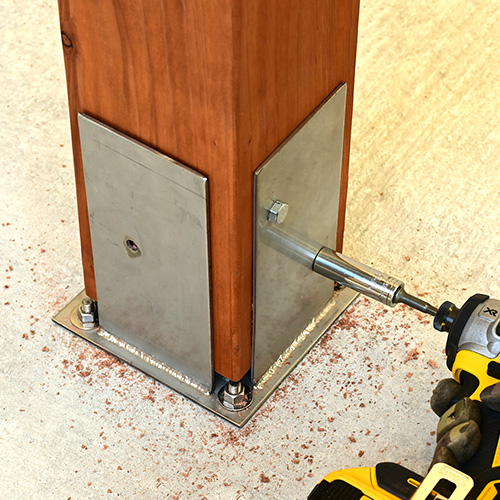
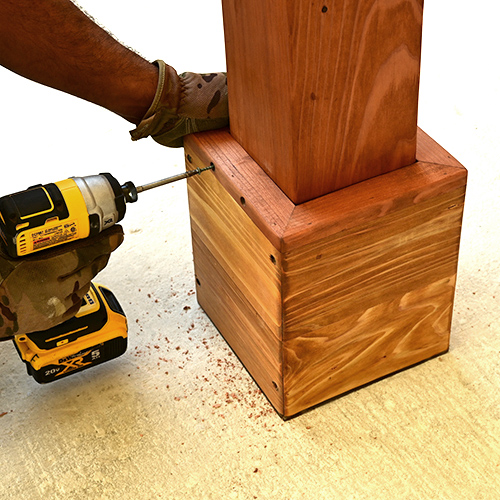
STEP 4: Drill holes in the post and attach it to metal anchors with lag bolts (5/16” x 3”).
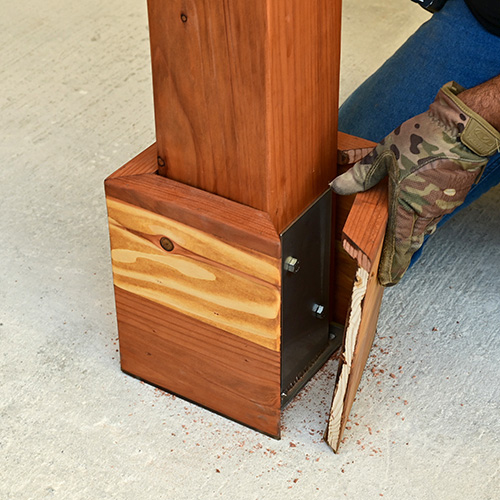
STEP 5: Place the wood boots over the anchors, fixed it with the screws.
The photos above show the 5 simple steps to follow once your surface below the Structure is in place. Choose the anchor kit for the appropriate surface:
- Stone, Brick or Concrete - Anchor Bolts (1/2”) for attaching to stone, brick, or concrete.
- Wood (e.g., Wood Deck) - Lag Bolts (3/8”) for attaching to a wood deck.
Read more about anchoring your Structure in our: FAQ, including the best grade of wood to choose yout climate.
OPTION 2: HIGH-WIND ANCHOR KIT
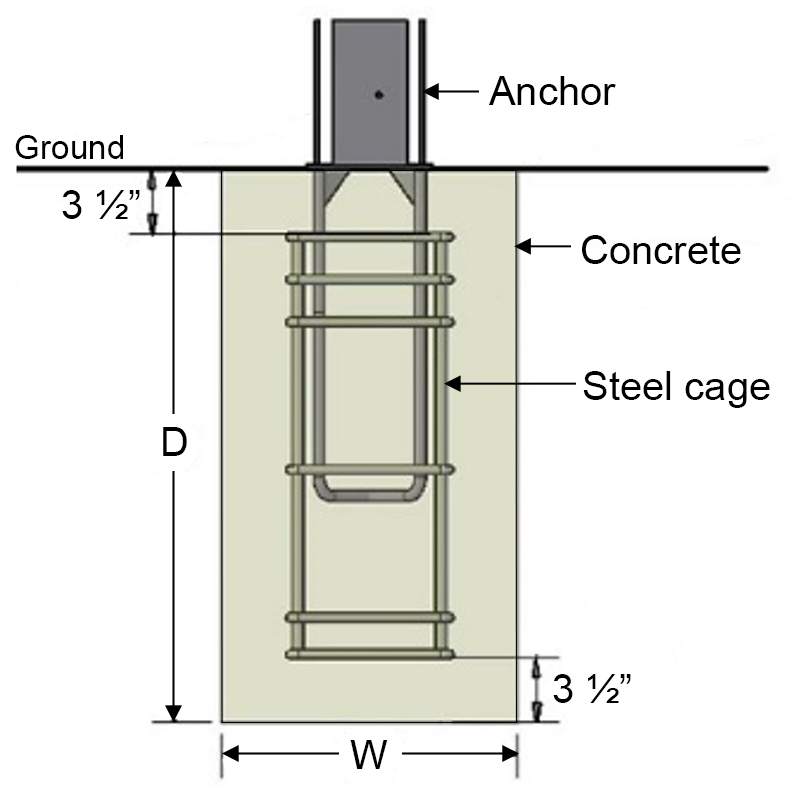
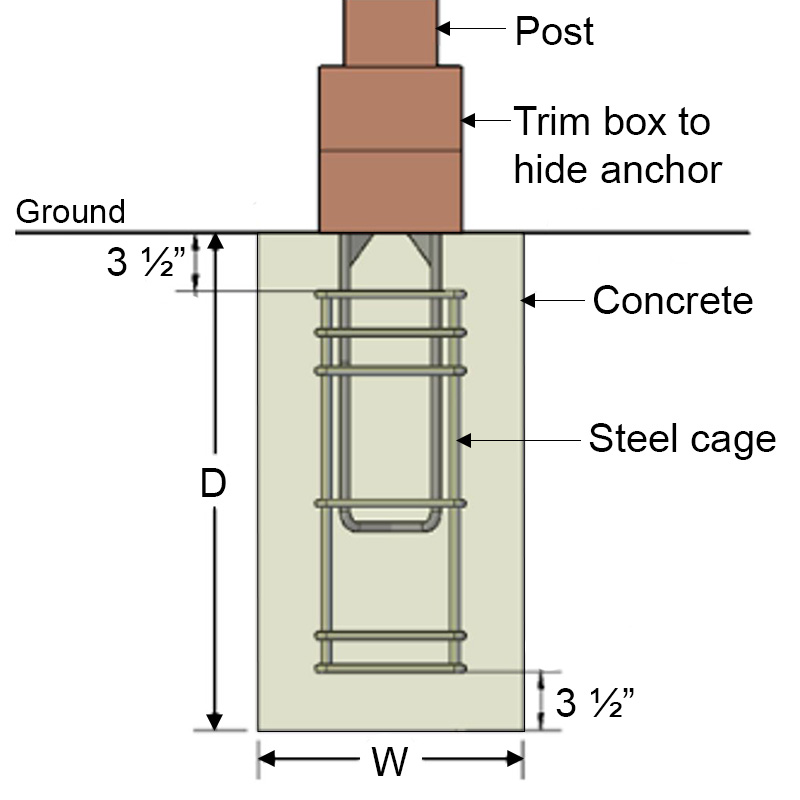
The High Wind anchor is rated to withstand winds of up to 150 mph. They are normally installed at a 30 to 42 inch with a significant portion of the anchor in concrete underground as shown in the drawings below. For best results, we recommend doing the concrete work at least 3 days ahead of the Structure install so the concrete will cure prior to attaching the Structure to it. You then place the wood posts in the cradle and bolt the wood to the anchor. We supply wood trim pieces to hide the hardware so the bottom of the posts look like they have a wooden boot around them when installation is complete.
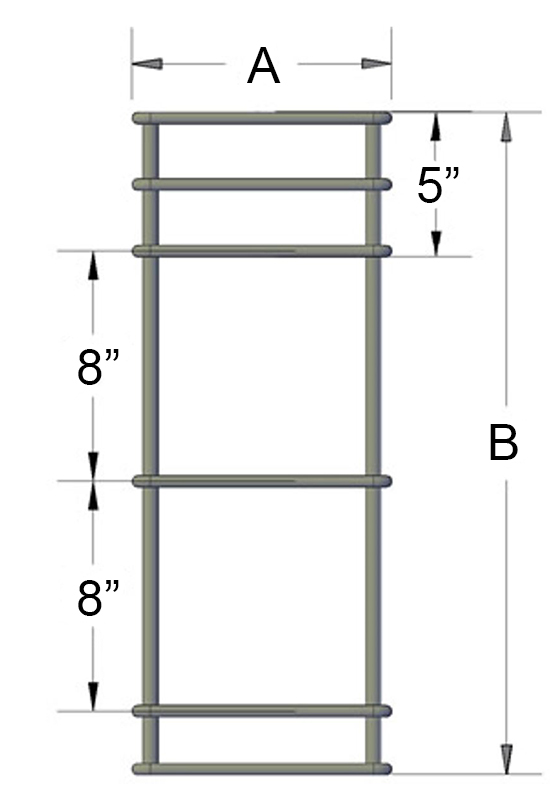
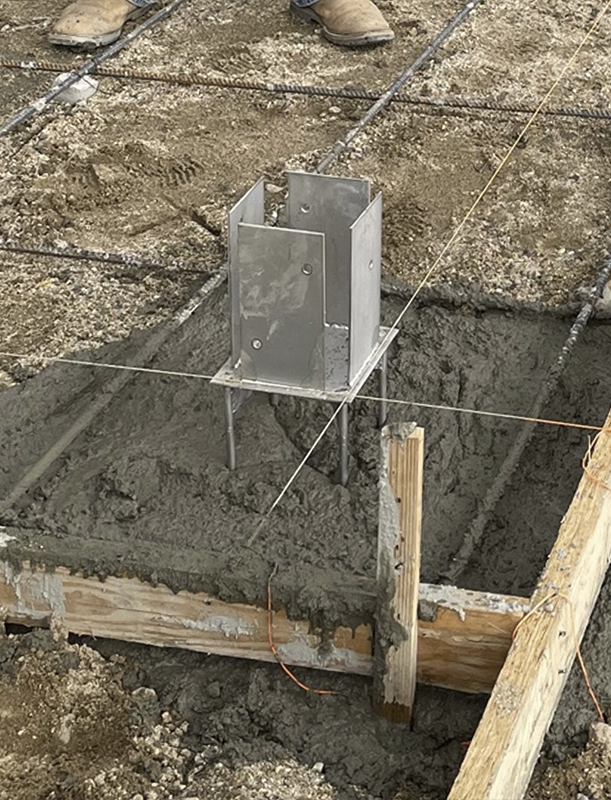
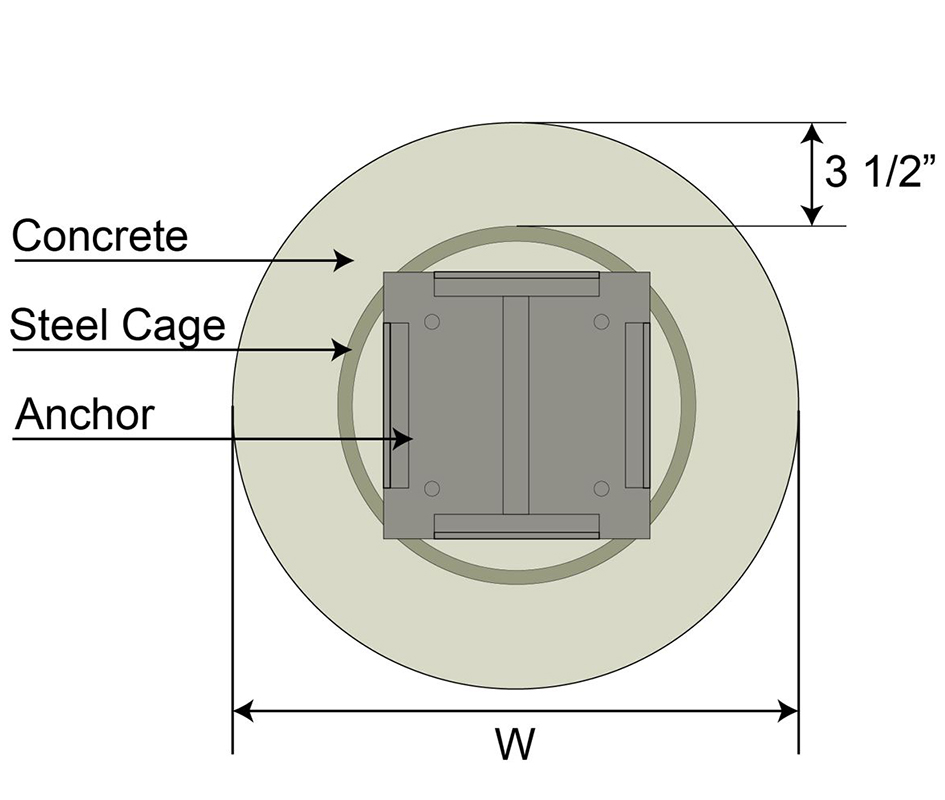
STEP 1: Dig a footing hole per size shown on your drawings. Add a 3 ½” concrete base to then place the rebar cage as shown (you may use a sonotube).

STEP 2: Place the high wind anchor level (you can use some timbers as shown to keep it in place). Make sure all the anchors are level to one another and square to one another.
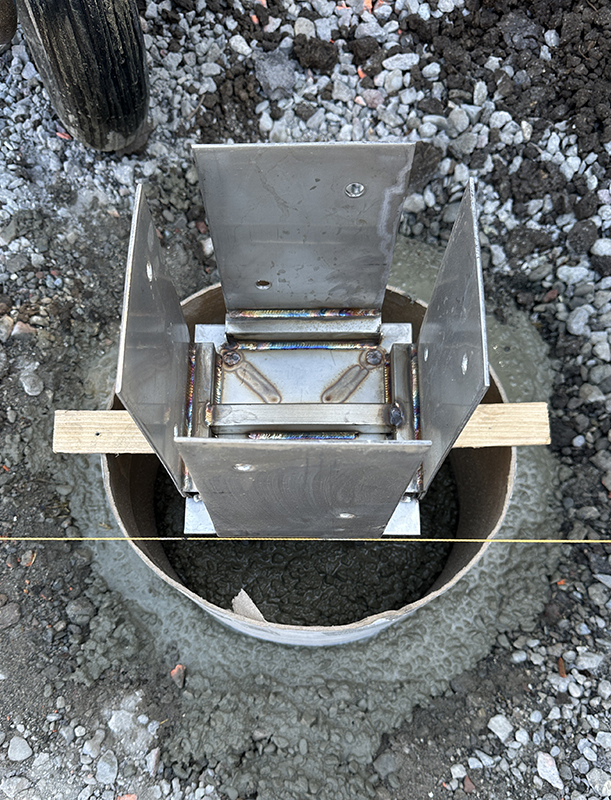
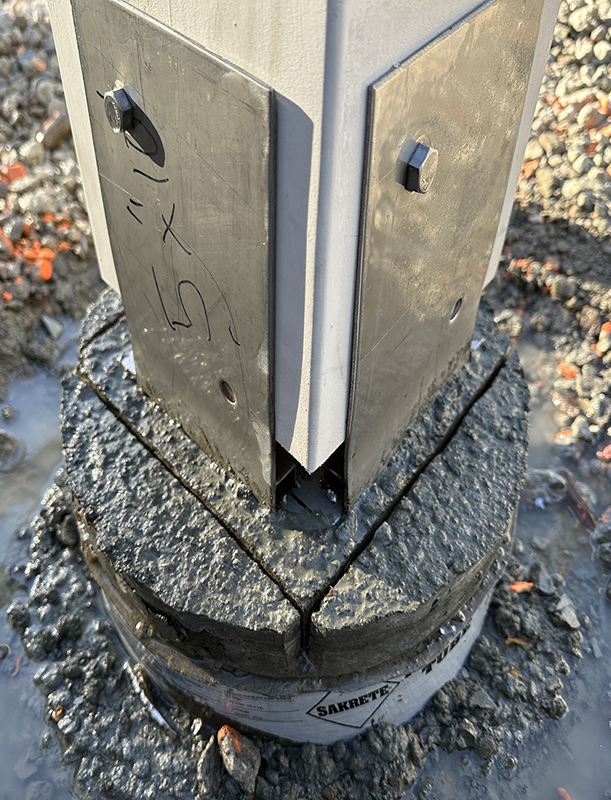
STEP 3: Pour concrete to a few inches below grade as shown. This way you can place your final hardscape over most of the footing so it will never be visible. If you are pouring your concrete pad before the installation of the anchors, place the sonotubes to avoid cutting the new concrete pad when you have the make the footings.
STEP 4: Attach the post to the anchor with lag bolts, then place the wood boots over the anchors and fix it with the screws.
| POST | ANCHOR BASES | STEEL CAGE | FOOTING | |||||
|---|---|---|---|---|---|---|---|---|
| Sizes | PTR Gauge | Anchor Steel Base (PTR) | Steel Base Diameter | H | A | B | W | D |
| 3-3/4" x 3-3/4" | 1/8" | 6" | 3/8" | 12" | 7" | 23" | 14" | 30" |
| 5-1/2" x 5-1/2" | 1/8" | 8" | 3/8" | 18" | 9" | 29" | 16" | 36" |
| 7-1/4" x 7-1/4" | 1/8" | 8" | 3/8" | 18" | 11" | 29" | 18" | 36" |
| 9-1/4" x 9-1/4" | 1/8" | 10" | 1/2" | 20" | 13" | 35" | 20" | 42" |
| 11-1/4" x 11-1/4" | 1/8" | 10" | 1/2" | 24" | 17" | 35" | 24" | 42" |
See chart above for typical recommended footing depth, but the final footing design will be part of your final approved working drawings that you will receive as part of the ordering process.
More technical details at: https://www.foreverredwood.com/media/pdf/anchor-options-technical-information.pdf