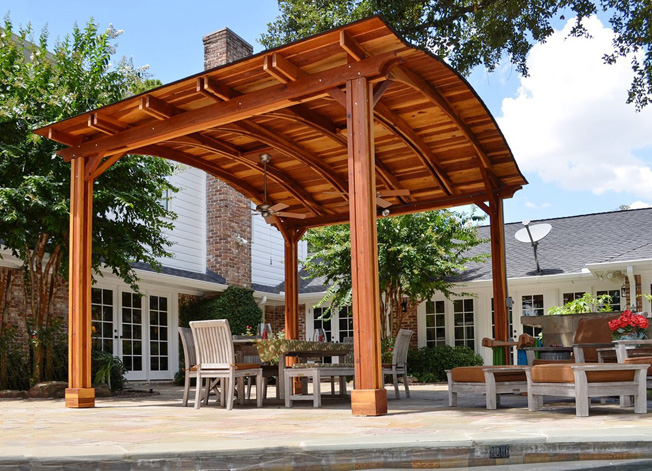
If you’re a homeowner, looking for wood pavilion kits that meet your budget and quality standard is a big deal, and a big project to take on if you’re going the DIY route. It’s a significant investment, and a long-term decision when it comes to augmenting your home. Once you find the perfect DIY wood pavilion kit, you’ll need to put it together, and that can come with a bit of stress if you don’t know what you’re getting into first. We understand this commitment and how important it is to make sure you get it right the first time. Installing a pavilion kit can be fun, and immensely rewarding upon completion. To help guide you through the process of doing it yourself, here are five quick tips!
- Pick the placement of your pavilion carefully. This may seem like an easier task than it is, but you really need to do your homework before you choose where to put your pavilion on your property. Aside from the aesthetics of where you place it, you’ll need to consider the path people use to access it, where rainwater collects, and how brushes and trees will be affected after installation. Choose an area that is not the lowest point in your yard, to avoid water buildup. Also, try to place your pavilion close to the house or build a stone path leading up to it so frequent foot traffic won’t damage your grass. Lastly, make sure you don’t infringe on any natural habitat in your yard where insects or animals live (they may be there, even if you don’t see them!).
- Thoroughly check your HOA requirements and local building codes. Redwood pavilion kits, when assembled, are a significant addition to your property. They’re large, require building, and often change the aesthetics of your home entirely, especially in areas where other homes and yards are close together. Before making the commitment to buying and building one, call your HOA and get specific details on the rules that apply to installing a pavilion on your property. You may also want to check with town or city building codes. Pavilions aren’t considered permanent outdoor structures, so you most likely will not need a permit. However, since they are large, you may be in violation of other size regulations if you’re not careful. Either way, it’s better to be safe than sorry and double check.
- Measure twice, and be precise. Sounds like a no-brainer, but we can’t stress this enough. A pavilion is a very large structure that will take up a lot of space in your yard or garden. Leave enough room on all sides to comfortably walk around it, and pick a pavilion that is sized relatively to your house and where you want to place it. So, for example, if you’re installing your pavilion close to a low-hanging, sloped roof, make sure the height of it matches accordingly. If you have limited space, and are planning on putting it close to a wall or tree line, leave about 3-4 feet of space so you can walk behind it. Also measure for trees, which may have branches that hang over your pavilion roof. Take careful measurements of your yard, the furniture that’s already there, and match them to fit your new pavilion. Remember, it’s always best to err on the side of caution to save you future headaches and stress.
- Site preparation. A pavilion has no attached base and therefore needs to be anchored to either post footings, or a concrete foundation. If you don’t already have this base ready to go (like an extended concrete patio), you’ll need to prepare for building it. This requires not only buying the materials and plotting the foundation but also making sure the space you’ve chosen for placement is apt for it. If you’re laying a concrete foundation, you’ll need to dig, which means you should call 811 first and make sure there are no pipes or wires underneath. The same goes for post footing foundations.
- Don’t be afraid to ask for help. While all of our DIY pavilion kits at Forever Redwood are designed for easy assembly and require minimal tools, you still may be biting off a bit more than you can chew. DIY projects require time, energy, and commitment in order to get it right. Sometimes, even the best of us underestimate the time we have for these types of projects, which may feel overwhelming if you’re not ready for it. That’s OK, and there’s no shame in asking for help if you need it. Make it a family project, hire a local contractor, or even get an install team to assist you if you feel like it’s going to be too much. You’ll thank yourself in the long run, and you’ll still get to enjoy your completed pavilion in the same way, for many years to come.
For any questions, comments, or product inquiries, don’t hesitate to call us or contact us here. We have a wide selection of DIY pavilion kits, each with customizable options for size, wood type, and style. No matter how big the project, we’d love to help!


